Headers allow everyone working on the sheet to identify what the information means more quickly. By freezing the top row, you can ensure that the headers remain visible as you scroll.
The first method we will outline is how to add a Google Sheets header row and the second will outline the process for editing page headers on a Google Sheet that you are about to print.
Follow these steps to create a header in your Google Sheets:
1) Ensure your headers are located on the first row.
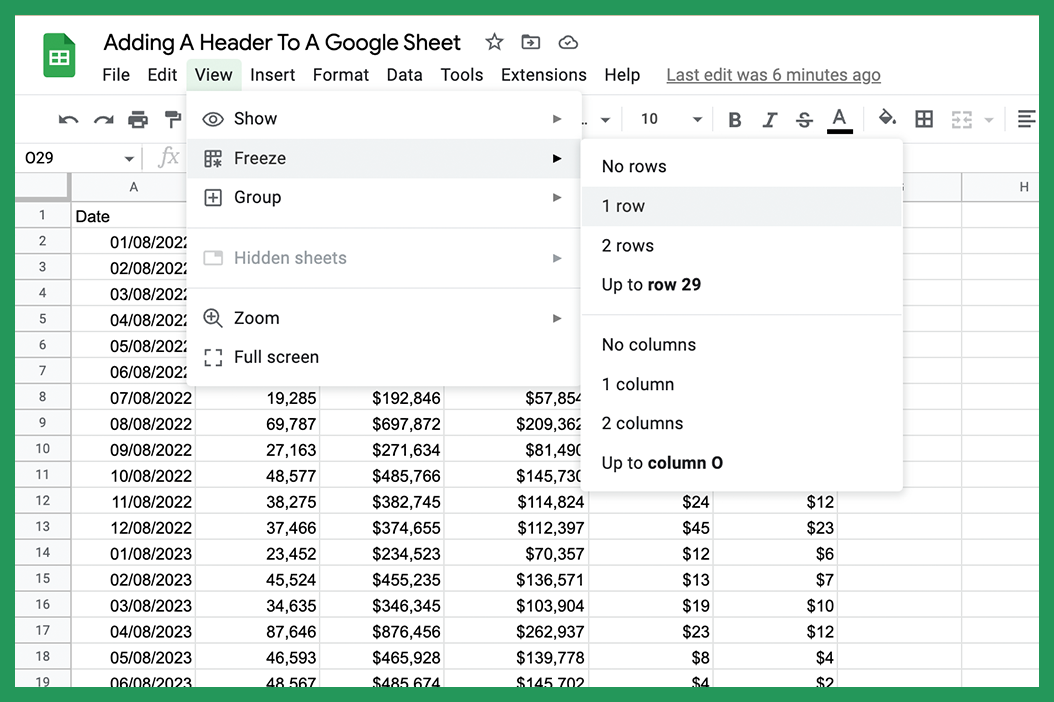
2) Click on the "View" panel.
3) Select "Freeze", then "1 row".
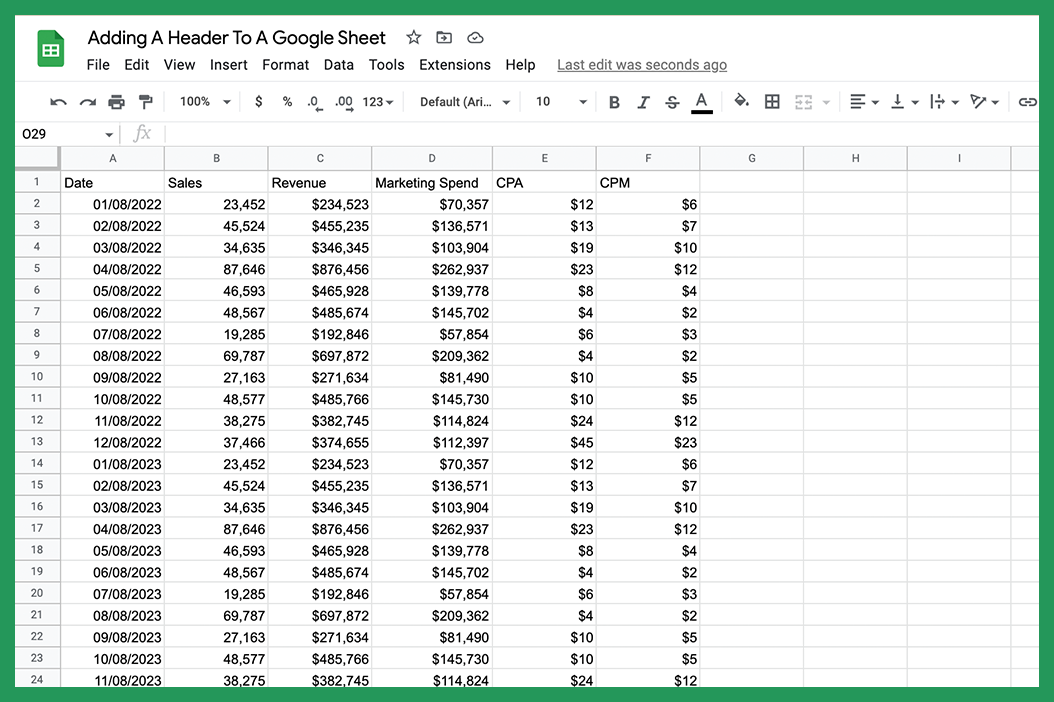
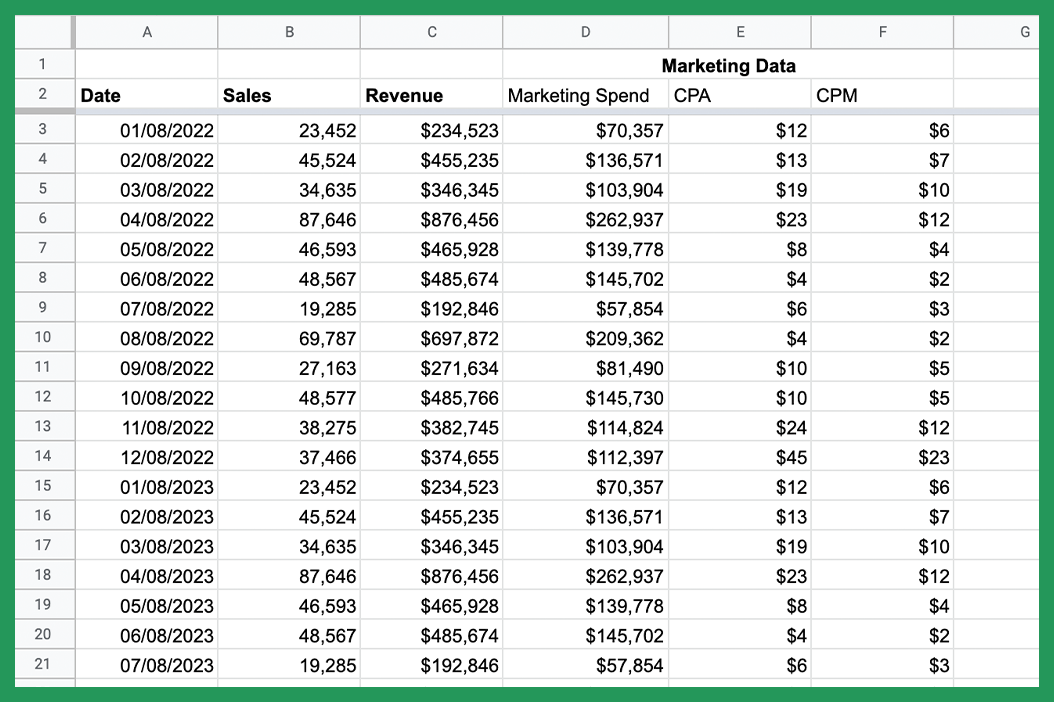
In the example below we have created a Google Sheet with sample data for a company that is reviewing its finances. They have included headers for Date, Sales, Revenue, Marketing Spend, CPA and CPM but want to freeze the first row so that as they scroll they can see which column title the data is referring to without having to scroll back up.
If you are starting without column titles, these can be added by inserting a row above your data. Right-click on the row number where you want to insert your header and select "insert row above" to insert a blank row. This blank row is where you can decide on the header titles that make sense for your spreadsheet.
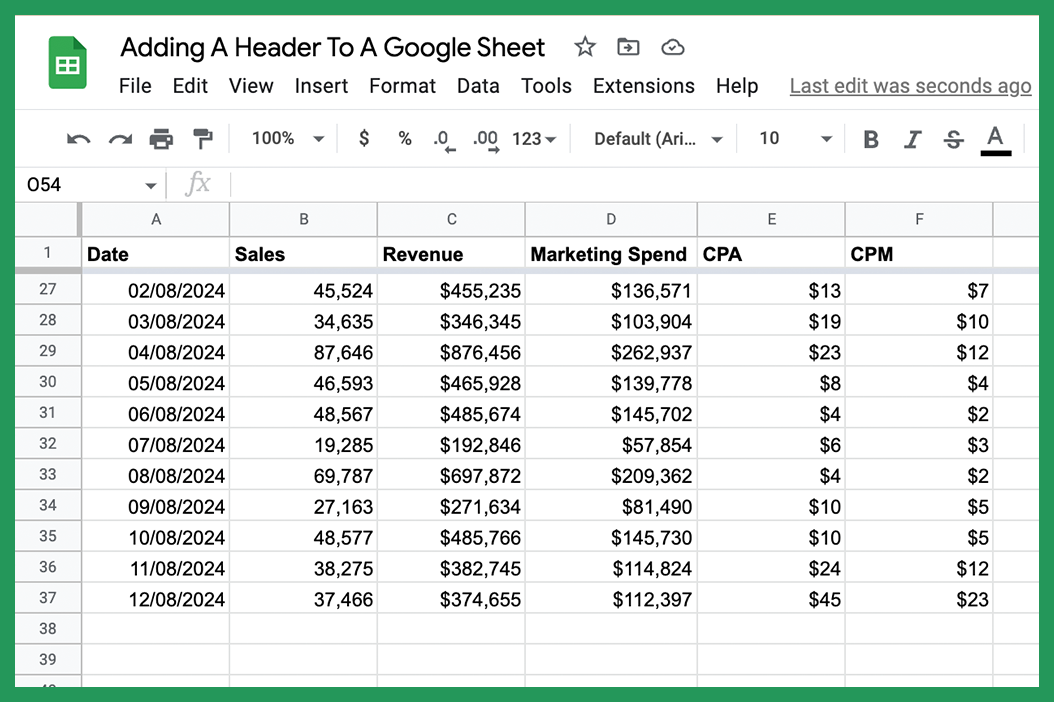
To freeze the top row we follow the three-step process outlined above. This will ensure that all of the header information remains visible while we scroll through the document. The header text is also bolded for increased clarity in the screenshot below.
Creating a header row does not necessarily involve freezing the first row. On the other hand, many will want to, especially when working with large data sets that run multiple pages.
The header data provides the category of information for each column. For example, the "Amount" column may list the amount of money spent on each project. The "Category" column can tell us what category the project falls into. This is important information to see while scrolling a spreadsheet.
Creating a header can be as simple as adding titles to your columns. This is normally enough when working with 10-20 data points.
However, formatting is important because it allows you to quickly and easily identify different categories of information. Headers that are bolded or underlined, for example, will stand out and be easier to locate.
How To Format Headers and Footers When Printing Google Sheets
When printing a Google Sheet it can be useful to add headers and footers to provide additional high-level information about what the document contains.
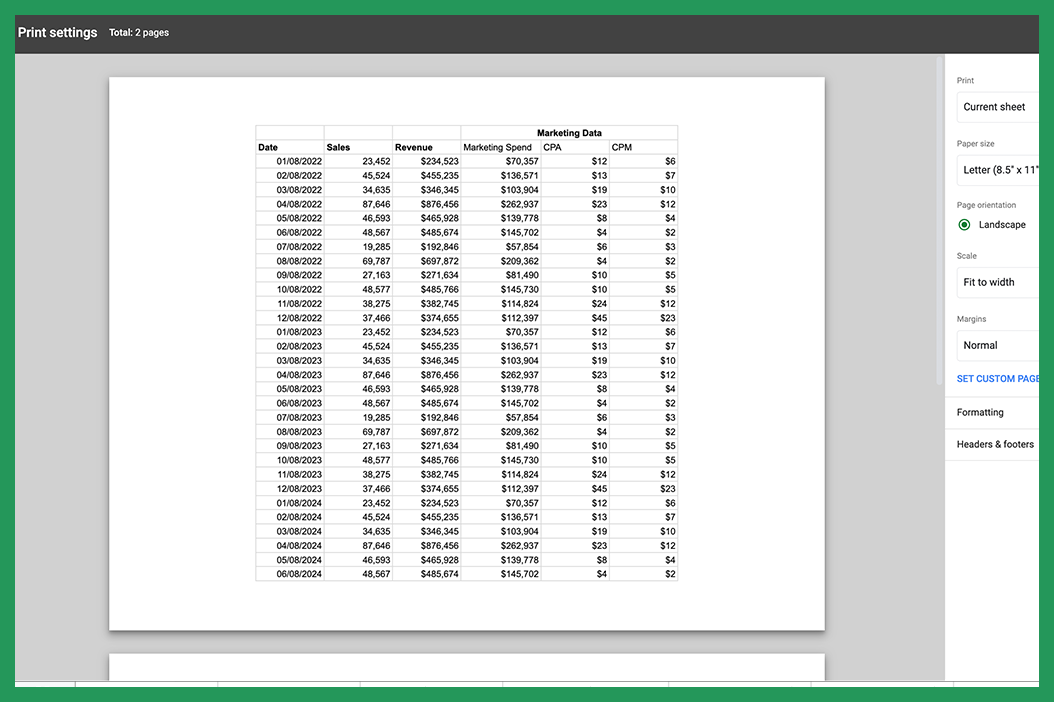
Go to "File" > "Print" and you will be presented with a print settings page.
In the print settings pop-up, on the right-hand side, there is a dropdown named "Headers & footers". Click on it to open it up and we will have the ability to add page numbers, a workbook title, a sheet name, the current date, and the current time. These are all part of Google Sheets's inbuilt functionality that can be added at the click of a button.
However, if we want to add more custom data, we can select "edit custom fields" to add our own custom headers or footers. Here we can add the name of the person or department who created the worksheet, footnotes, or any other relevant information. Now when you click print, the headers and footers will be added to every page.
We can also format the sheet on the print settings page to include or remove page notes and gridlines. There are also options to adjust margin size and change the orientation from landscape to portrait.
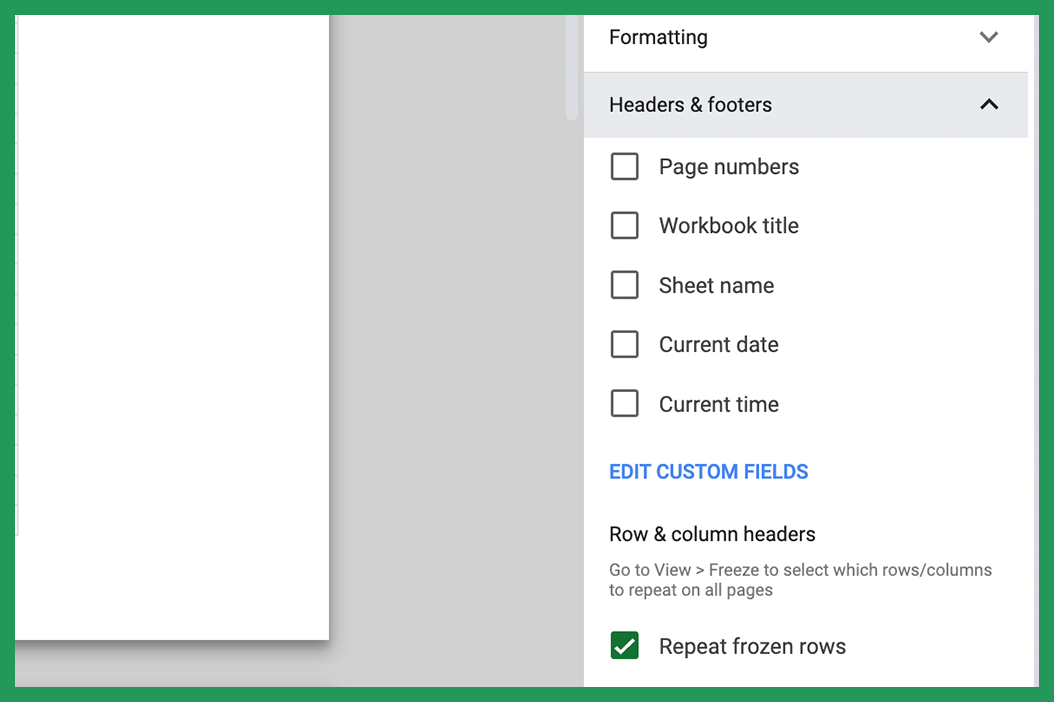
Below this, we will see the option to repeat frozen rows. When selected it will add the frozen header rows to the top of every page. This is generally recommended to include so the person reading the document does not have to refer back to the first page to find out what the header is for each column.
Should I Create One Or Two Header Rows?
In many contexts, a single header row works fine. However, if you are working with a more complex data set, it might be helpful to freeze more than one row. This will allow you to better group your data into more easily understandable sections.
For example, if you have data for spending, revenue, and profit for multiple budget lines it can be worth adding a second header row so you understand which one you are referring to in each column.
This way it is easier to understand numbers when they are broken down for each team. The marketing, finance, and sales teams will all have salaries and the boss may want to track how much the salaries of each team costs the business to determine whether a new hire can be made next quarter.
If there is a single header row and there are multiple salary columns it will become confusing quickly. However, if there is a second header row displaying which team the salary is referring to it will provide the additional necessary context. This is not the only way to achieve this but it is one of the most easily readable.
How Can I Add A Column Header In Google Sheets?
The process of adding a column header or sidebar is very similar to the way you create a row header. Add the headers you would like to the first column and open up the View menu.
Click "Freeze" from the list of available options and then select "1 column" or "2 columns" depending on whether you need one or two vertical headers. Your chosen headers will stay fixed in place as you scroll, making it easy to reference dates or other important information.
How Can I Make My Header More Attractive? Font, Font Size, Color
A header is designed to be easily understood, so using a font that is easy to read will make the document easier to follow. Adding too many fonts or colors can be confusing, so it's best to stick with one or two simple options.
You can edit the font size, font type, bold, italics, and strikethrough options from the ribbon. Alternatively, this can be edited in the "Format" menu.
Who Can Edit The Headers On A Google Sheet?
The owner should always be able to edit the headers but if you would like another person to be able to edit them too, you can share access with them. In the top right there is a button labeled "Share". You will then be prompted to enter an email address. When this is done you can define their permissions, Viewer, Commenter or Editor. In order for someone to edit the header they will need to be an Editor but make sure this is someone you trust as they will be able to edit the whole document.
How Do I Add An Image To A Google Sheet Header?
Adding an image or company logo to the header of your document can make it look more professional. We can do this by adding an image to the header row. Go to the cell where you want the image to be and click on the "Insert" menu. Scroll down to "Image" and then select "Insert image in cell". You will then be able to upload a company logo or an image of your choosing to the header row.
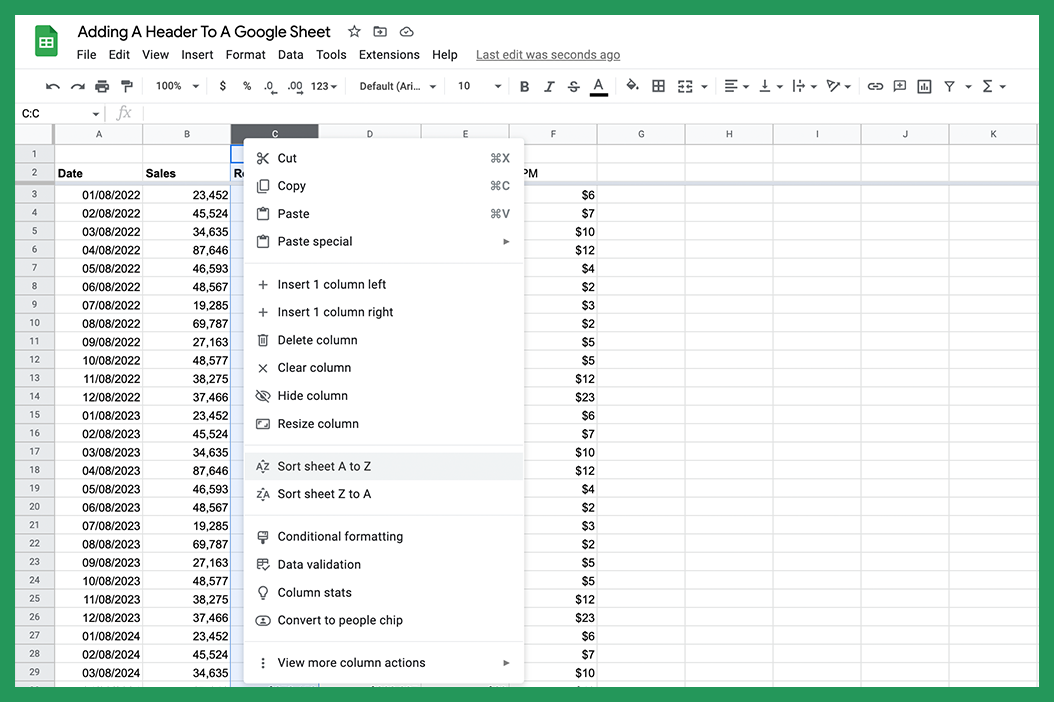
How Can I Create Sortable Headers?
If you have followed the steps above your data should be sortable. To begin, click on the column header letter and there will be an option for sorting the data. In the example below there is an option to sort the data into alphabetical or reverse alphabetical order.
Another way to do this is by highlighting the relevant column, clicking "Data" > "Sort Range" > "Advanced Range Sorting Options". Here you will be able to sort in ascending and descending numerical order, alphabetical order, by date, and many other ways depending on the data in your sheet.
Whether you’re just getting started with Google Sheets or you’re a longtime user, we hope this guide has helped you learn how to make a header. They are a great way to make data more readable and visually appealing. If you have any comments, questions, or suggestions about this guide feel free to reach out in the comments below. We'd love to hear from you!