In this guide, we will show you how to create drop-down lists from scratch. It's actually very easy to do!
Drop-down lists can be very useful for a number of reasons:
- First, they can help you keep your data organized and tidy.
- Second, they can make it easier for you to find the data you're looking for.
- And third, they can help you avoid making mistakes when entering data into your spreadsheet.
The primary way to create drop-down lists in Google Sheets is by using the Data Validation feature. It uses the Data Validation feature. This method is fast and effective, and it gives you a lot of control over how your drop-down list looks and functions.
How To Add A Google Sheets Drop-Down
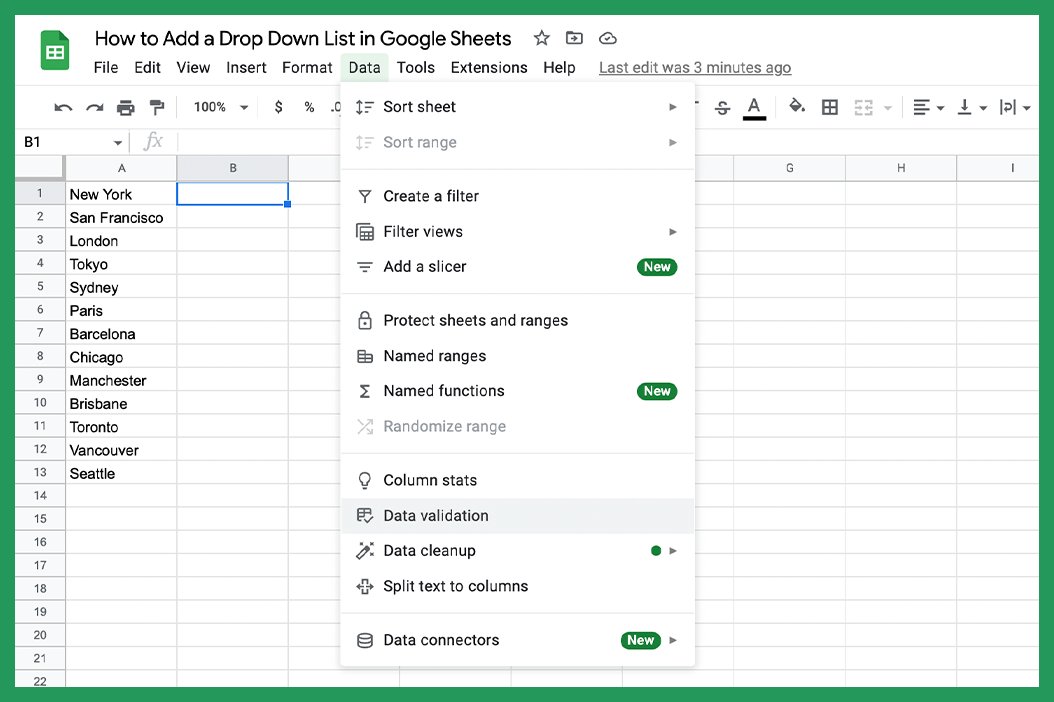
- Start with a list of data in one column and choose the location of the cell you would like your drop-down list to be in.
- Go to “Data Menu” and select “Data Validation.”
- In the data validation dialog box, on the criteria drop-down, select “List from a range” and in the adjacent cell highlight all the cells you would like to include. In our example case, it’s A1 to A13.
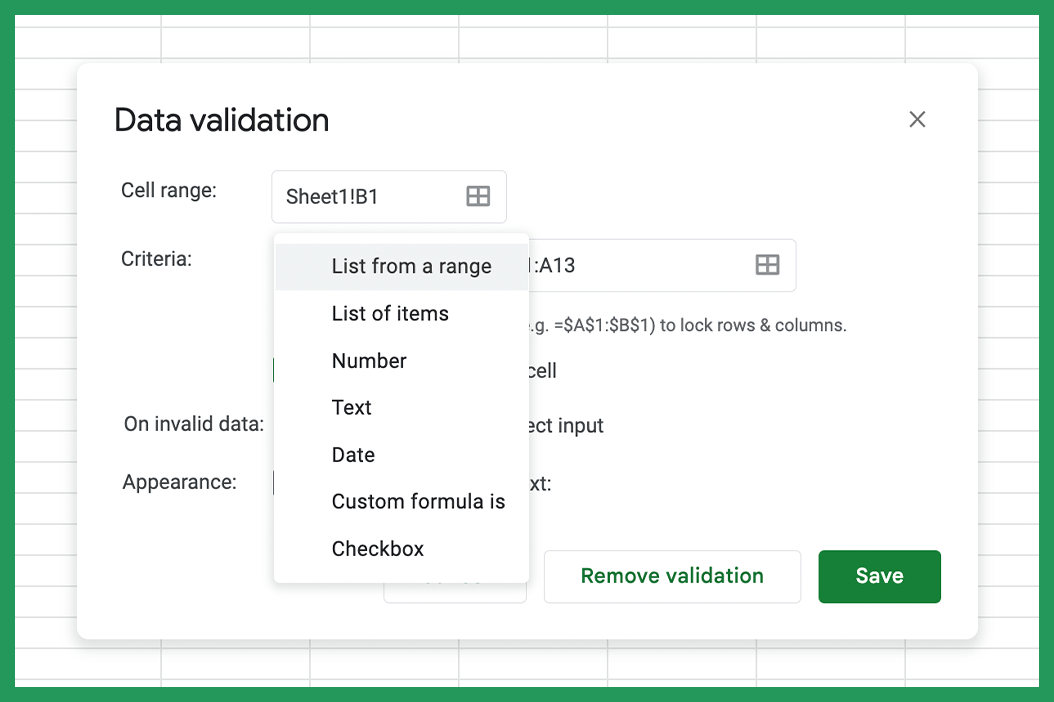
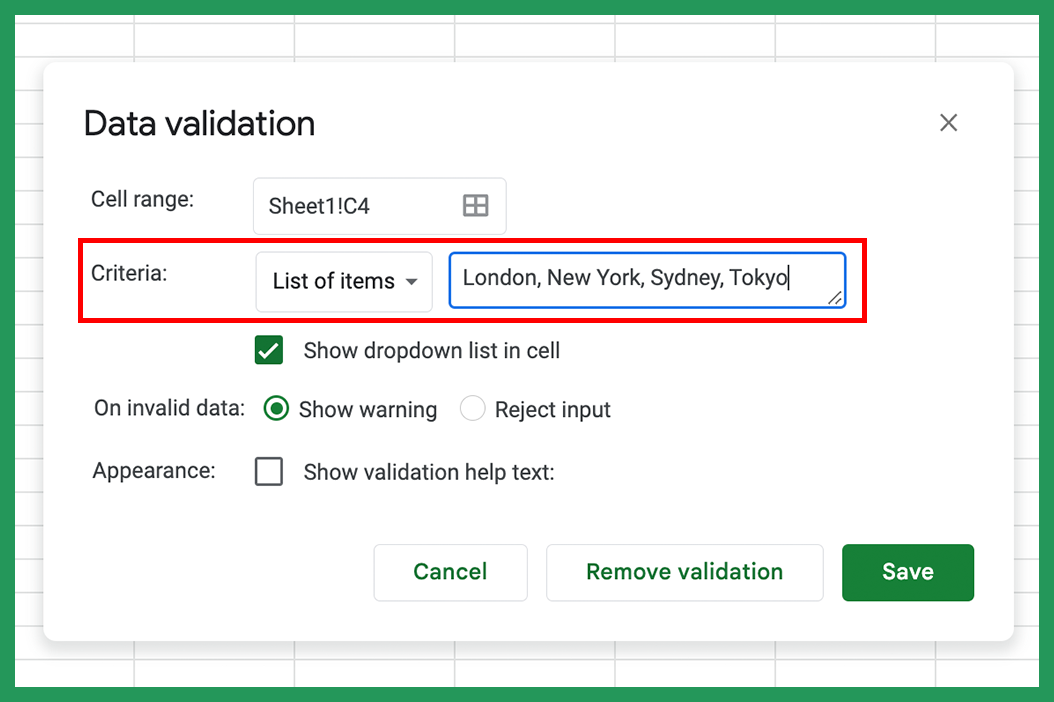
Note: We can also manually enter list items. By manually entering the items we avoid having to include the list on our worksheet. To do this we follow the same steps but we instead choose "List of items". The image below shows where this option is located.

- Make sure “Show dropdown list in cell” is checked.
- Select "Reject input" under "On invalid data" to ensure only values from your list are input. If you select “Show warning”, other values can be input which defeats the point of a drop-down list!
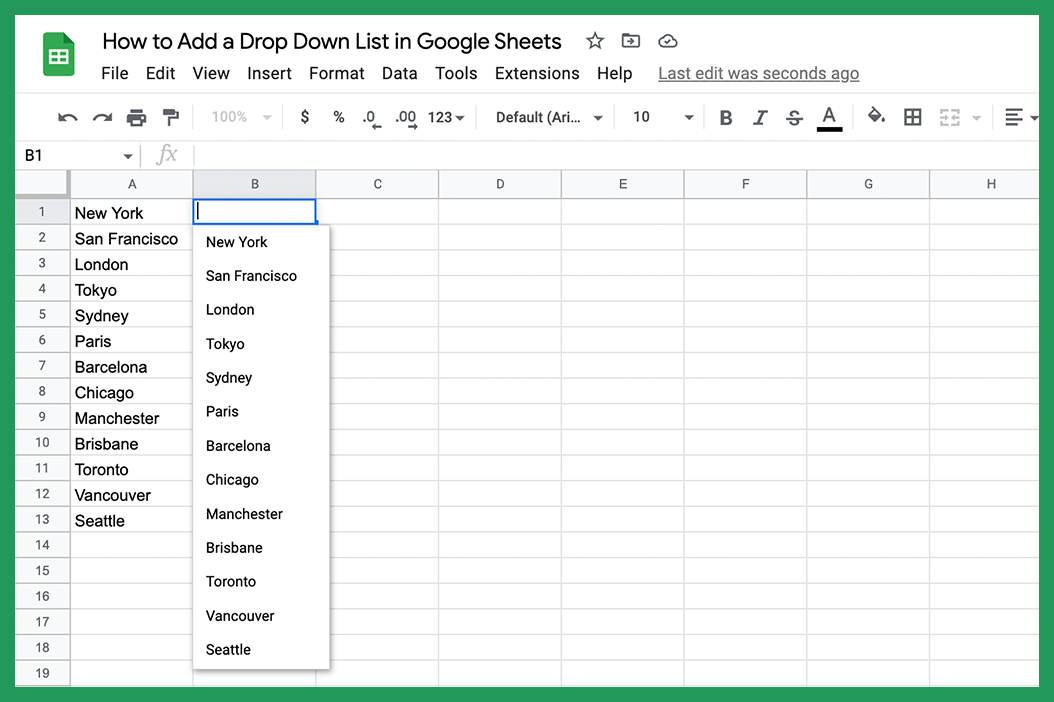
Click save and your new drop-down list will be created. A down arrow will appear in the cell you created the list in and you will be able to select a value from the drop-down menu. The available options will match the list you used to create the menu.
Now it’s time to copy it to multiple cells and add a little color. You can add a header if you want to.
How To Add A Drop-Down List To Multiple Cells
There are a number of ways to add our drop-down list to other cells. We can use “copy” and “paste”, we can simply drag our existing drop-down list along, or we can highlight the list of cells we want to add to our drop-down to when initially creating the list.
How To Create A Colored Drop-Down List
To add some color to our drop-down list we can use either alternating colors or conditional formatting. Alternating colors is the simplest method to color code our list so we will go through that first:
Alternating Colors
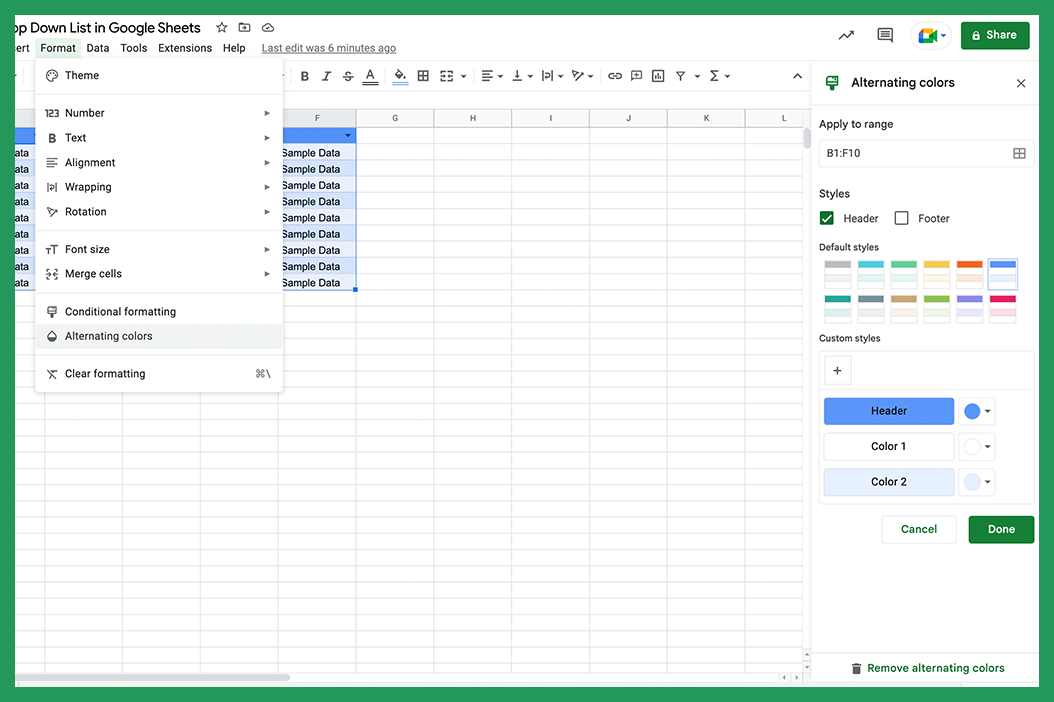
- Highlight the range of cells you would like to color.
- Go to “Format” Menu and select “Alternating Colors”.
- Check the correct range is selected by looking at the cells referenced in the “Apply to range” box.
- Select the style you like from the default styles or add a custom style of your own.
- By checking the “Header” and “Footer” boxes you will be able to adjust the colors of the header and footer individually.When you are ready press “Done” and your drop-down list should now be colored.
Conditional Formatting
- Highlight the drop-down list you would like to add color to.
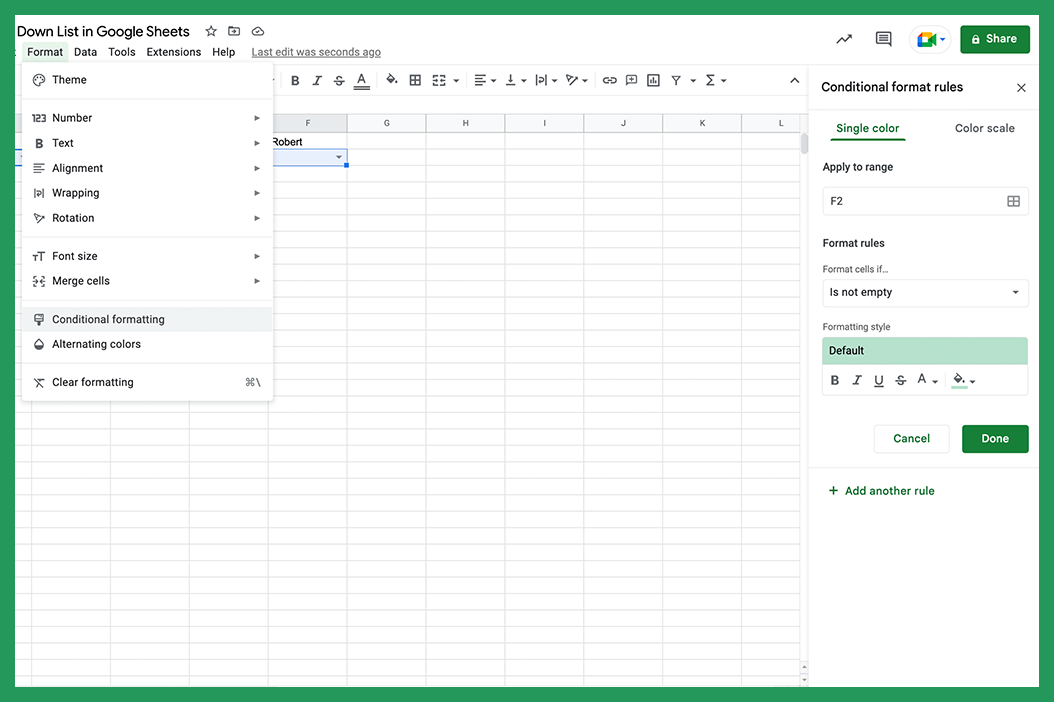
- Go to the Format Menu and select “Conditional Formatting”. This will bring up the “Conditional format rules” panel on the right side of the screen.
- Here we can choose between a “Single color” or “Color scale”. Under “Single color” we can add “Format rules”.
- In this example, we will select “Is empty” from the “Format cells if…” drop-down. This allows us to see which drop-down have not been filled in because the empty ones will be highlighted in green. You can add additional formatting rules as you see fit.

How To Remove A Drop-Down List
We remove drop-down lists in a similar way to how we create them.
- Highlight the drop-down list you wish to remove.
- Go to the “Data” tab and select “Data Validation”. In the “Data validation” panel select “Remove validation”. This will delete your drop-down list.
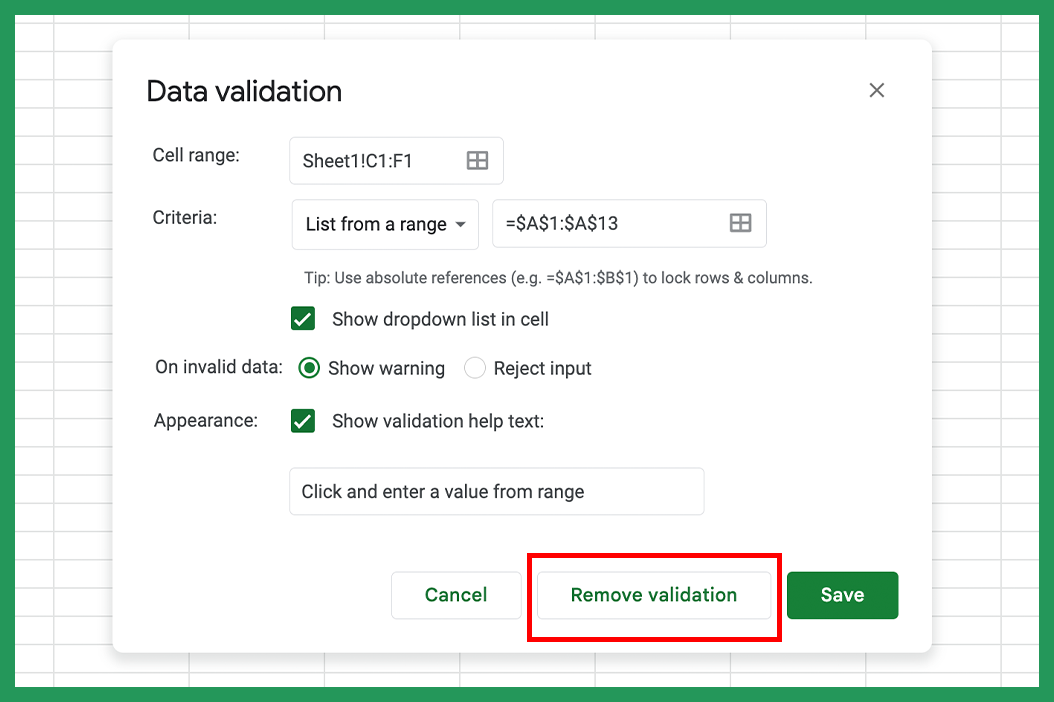
- If you would like to remove multiple lists at once, specify the cell range of those you wish to delete in the Data Validation dialog box. All of those within the range you select will be removed.

How To Edit A Drop-Down List
- In order to add a new option to our drop-down that was not in the original list we will need to make an edit in “Data validation”.
- Before we do that, make sure the new data point is added to the end of our list.
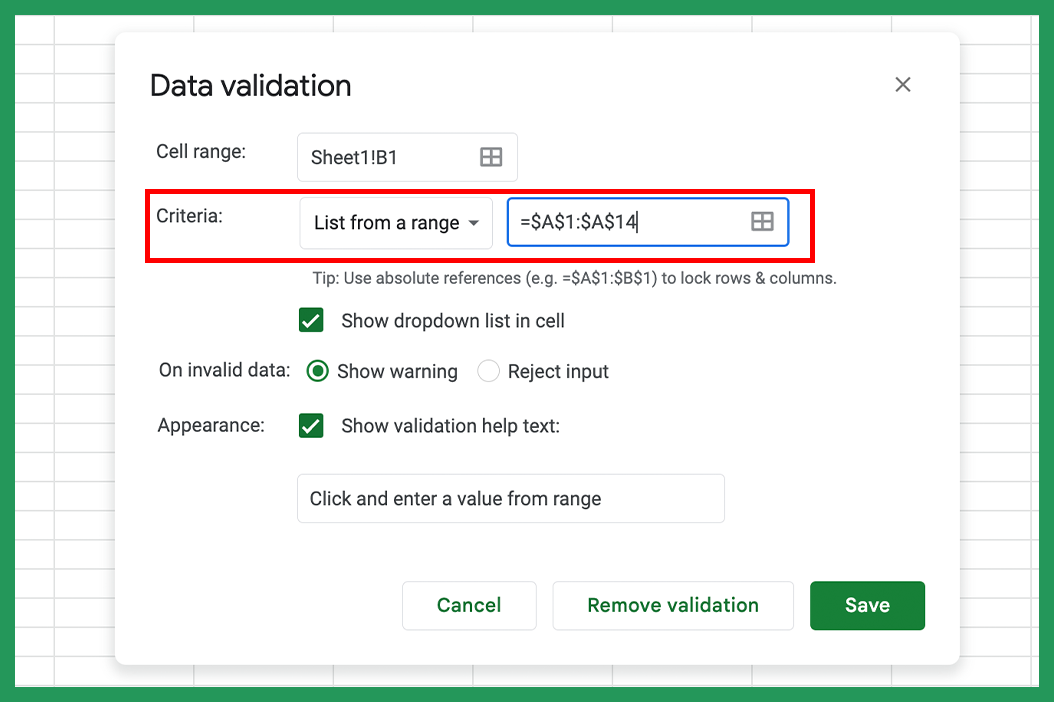
- Then go to the cell where our drop-down list is created, go to the “Data” tab and click “ Data Validation”.
- Next to “Criteria” adjust the “List from a cell range” value to cover your additional data points.
- In this example, we added one data point to cell A14, so we adjusted the limit of the range from A13 to A14.
- Hit "Save" and your new data point should be included.
Keep practicing and before long you'll be a professional at adding drop-downs in Google Sheets. They make data entry easy, data analysis more enjoyable and are especially important when multiple users are required to input data.
One of the great things about using the Data Validation feature is that you can specify exactly what data you want to allow in your drop-down list. For example, you could create a drop-down list of countries, or a list of product names. Or, you could create a list of options that are dependent on other data in your sheet.
Another advantage of using the Data Validation feature is that you can change the options in your drop-down list at any time. So, if you need to add or remove items from your list, you can do so without having to re-create the entire list.
Say goodbye to incorrectly spelled answers and "hello" to error-free answers by only allowing pre-defined options to be selected. We've also looked at how to add drop-down lists to specifically selected cells and copy the list to other cells.
Thank you for reading. If you run into any roadblocks while creating drop-down lists of your own - do not hesitate to reach out in the comment section below and we may be able to solve your problem.
We have created a number of guides around common issues that arise when using Google Sheets. Familiarize yourself with how to split cells or sort by date because although you may not need them right now, it's good to have the knowledge so that you're prepared when the need arises!