Hiding columns and rows in Microsoft Excel can be a helpful way to organize your data or clean up a workbook that is too cluttered. Hiding static data can also help improve performance when working with large spreadsheets. Many first-time users can feel overwhelmed with all the different methods used in Excel, but we promise once you get the hang of it you'll love how customizable Microsoft Excel can be!
In this article, we'll tell you exactly how to hide rows and columns in Excel. It's relatively simple, so if you're working on your first sheet, it should be a breeze.
How To Hide or Unhide Excel Columns & Rows
Hiding or Unhiding columns and rows in Excel is straightforward. Using these features enables you to maintain a manageable spreadsheet. Below you'll find just a small number of steps to hiding and unhiding hidden cells, rows, and columns - in many different ways.
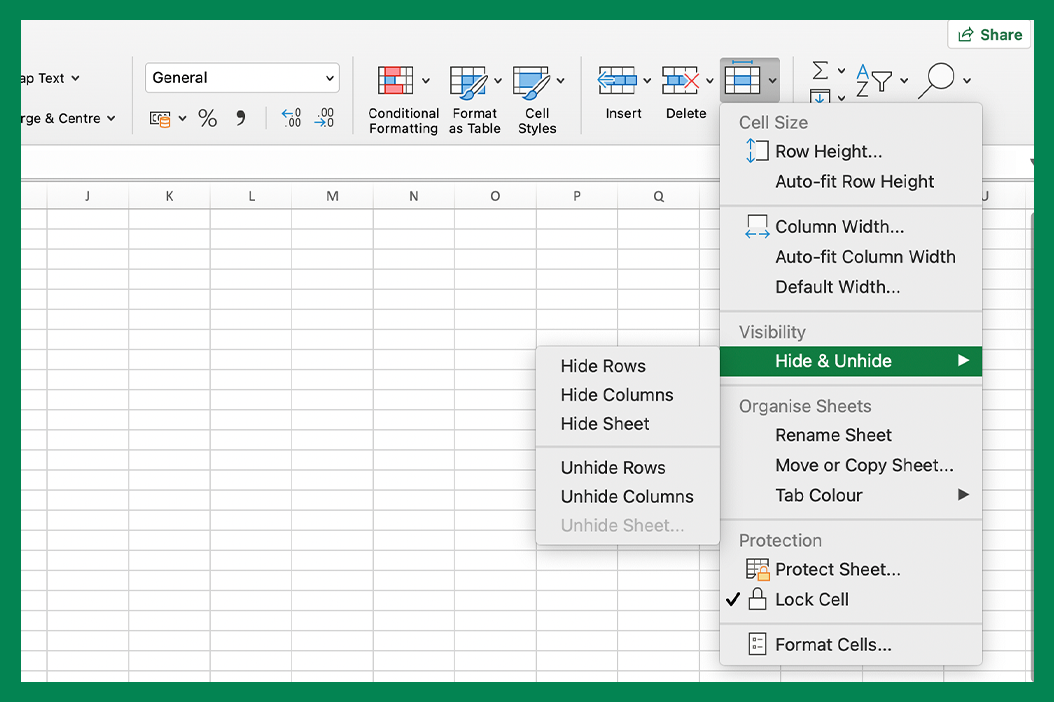
Hiding Rows and Columns in Excel (Select Hide Column)
- Select the number of columns or rows you want to hide (use the Control key to select an additional column or row).
- Click Format button (which you'll find in the toolbar)
- Choose Hide Columns or Rows.
- Your Columns and Rows in Excel are now hidden.
Data can also be hidden using the ribbon interface in Excel. To do this, go to the View tab and click the Hide/Unhide option in the Show/Hide group.
From the drop-down menu that appears, click Hide Columns or click Hide Rows. It's as simple as that!
Unhiding Rows and Columns in Excel (Select Unhide Column)
If you want to display a hidden row or hidden column, it's pretty much the same steps as hiding them. First, you're going to want to select the adjacent column or row on either side of the hidden cells. Then, right-click on your selection, and choose Unhide from the menu.
That's it. No more steps to this one. We told you it was simple!
Revealing A Hidden Row or Column
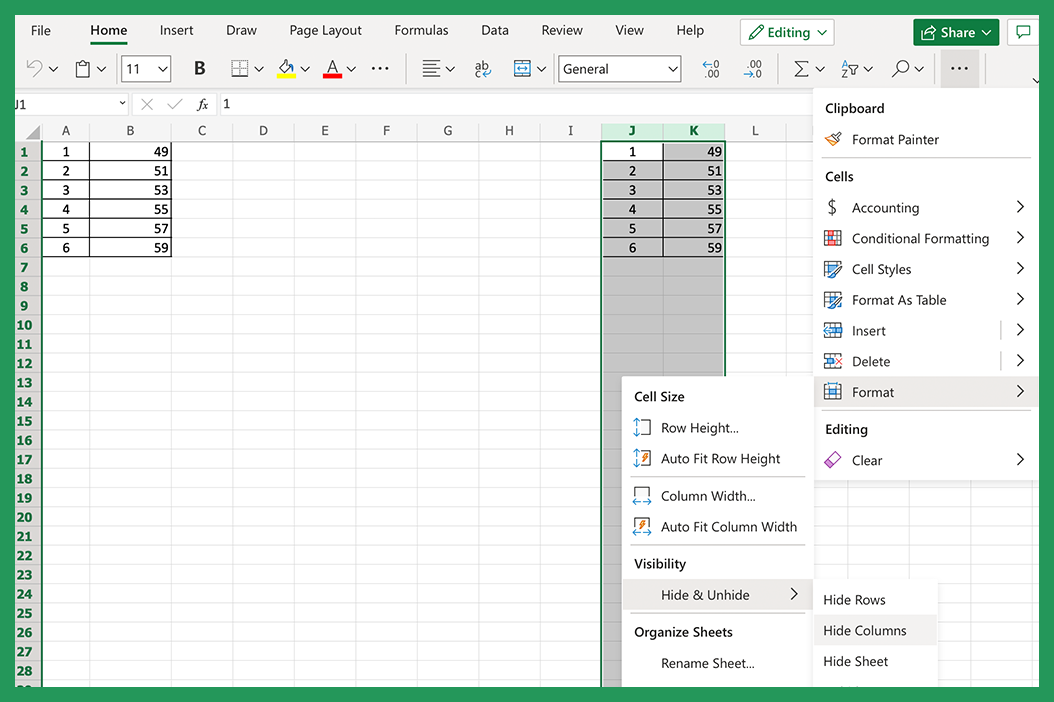
Multiple cells in the form of columns and rows can also be unhidden using the ribbon interface in Excel.
To do this, select the two surrounding columns or rows.
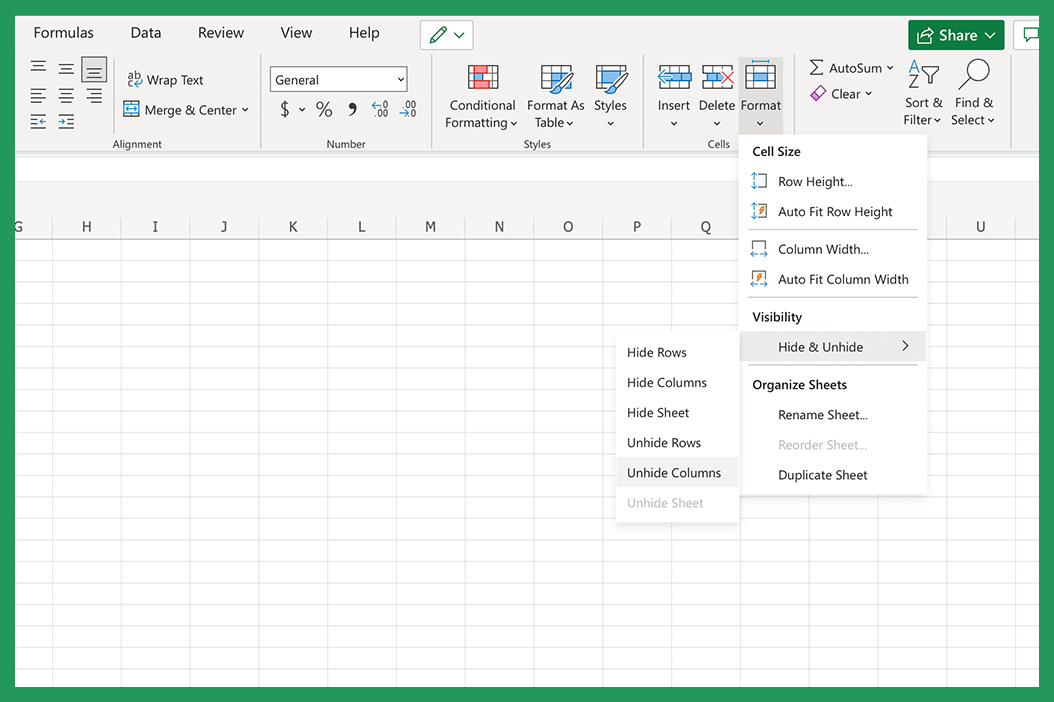
Then, from the Home tab, which you'll find in the Cells group, click Format, then click Hide and Unhide and choose Unhide Rows or Unhide Columns.
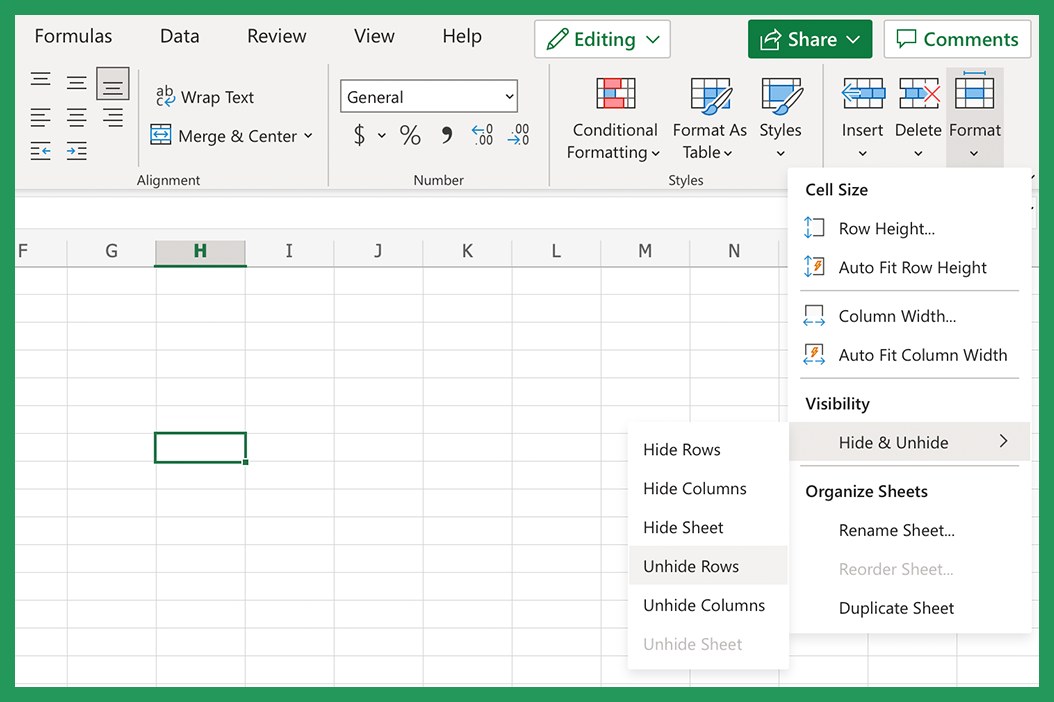
From the drop-down menu that appears, select Unhide Column or Unhide Row.
A dialog box will appear asking which hidden rows or hidden columns you want to unhide.
Select the multiple rows or columns you want to unhide and click OK.
Using The Hide/Unhide Excel Keyboard Shortcut
You can use keyboard shortcuts to hide cells and unhide hidden rows or columns in Excel.
To hide, select the column you want to hide and then press Ctrl + 0 (zero). Command + 0 (zero) for Mac users. To hide a row, select the entire row you want to hide and then press Ctrl + 9 (or Command + 9).
Select a column on either side of the hidden column and then press Ctrl + Shift + 0 (zero) to unhide what is currently invisible. Mac users can use Command + Shift + 0 (zero). To unhide a row > click on the selected row (on either side of the hidden row) and press Ctrl + Shift + 9.
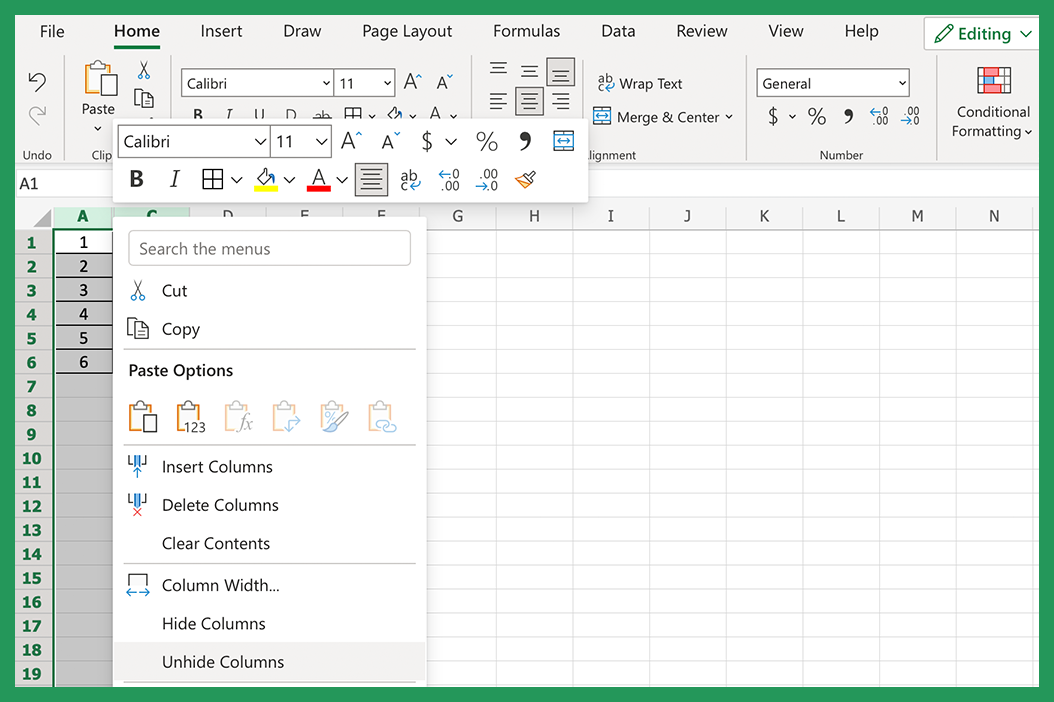
Using The Right-Click Method to Hide Rows
You can also use the right-click method for hiding and unhiding rows or columns in your spreadsheet. First, select the single or multiple rows and columns you want to hide or unhide, then right-click. In the menu that appears, select Hide or Unhide. The right-click method is the most popular among new Excel users, so we recommend this one if you're a newbie.
Hide/Unhide Columns and Rows Using the Group Feature
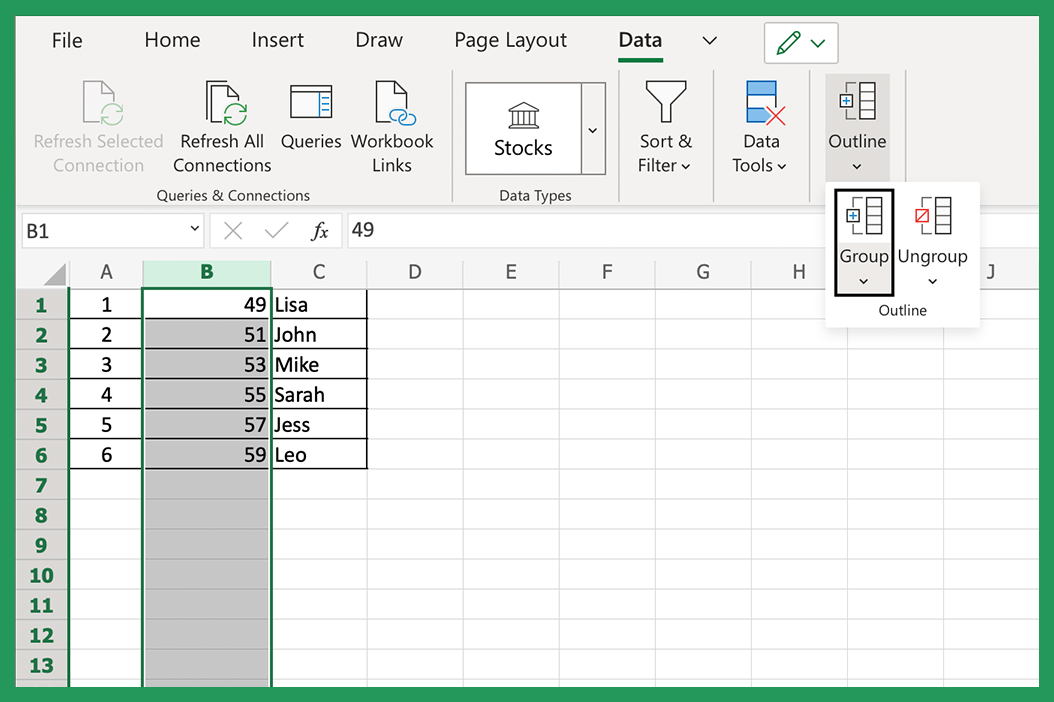
You can also use the Group feature in Excel to hide and unhide multiple columns and rows. First, select what you want to hide. Then, from the Home tab, click the Data tab on the ribbon and click the cells Group button.

This will show a minus sign, which you can click to hide the column. You'll then be shown a plus sign, so you can expand it easily again.
Click the Rows option to hide more than one row or the Columns option to hide more than one. Excel will then insert grouping symbols to the left of the selected rows or above the selected columns.
Again, to reveal a missing row or column in your Excel spreadsheet, click the expand symbols next to the rows or columns you want to reveal. You can also right-click on the cell and choose Unhide columns from the menu.
Hide and Unhide Rows & Columns in Excel With VBA Macros
You may be better off using a macro if you have a large workbook in Microsoft Excel that you need to hide and unhide rows and columns. The following two macros will do the job:
The first macro will hide all columns in the active workbook; you can just sit back and watch the magic happen!
The second macro will reveal all columns in the active workbook. Awesome, right?
To use either of these tools, copy and paste the macro into a module in your workbook. Then you will run the macro by pressing F5 and right-clicking on the sheet name where you want to hide or unhide columns.
Macro To Hide All Columns in a Spreadsheet
This macro will hide all columns in an active workbook.
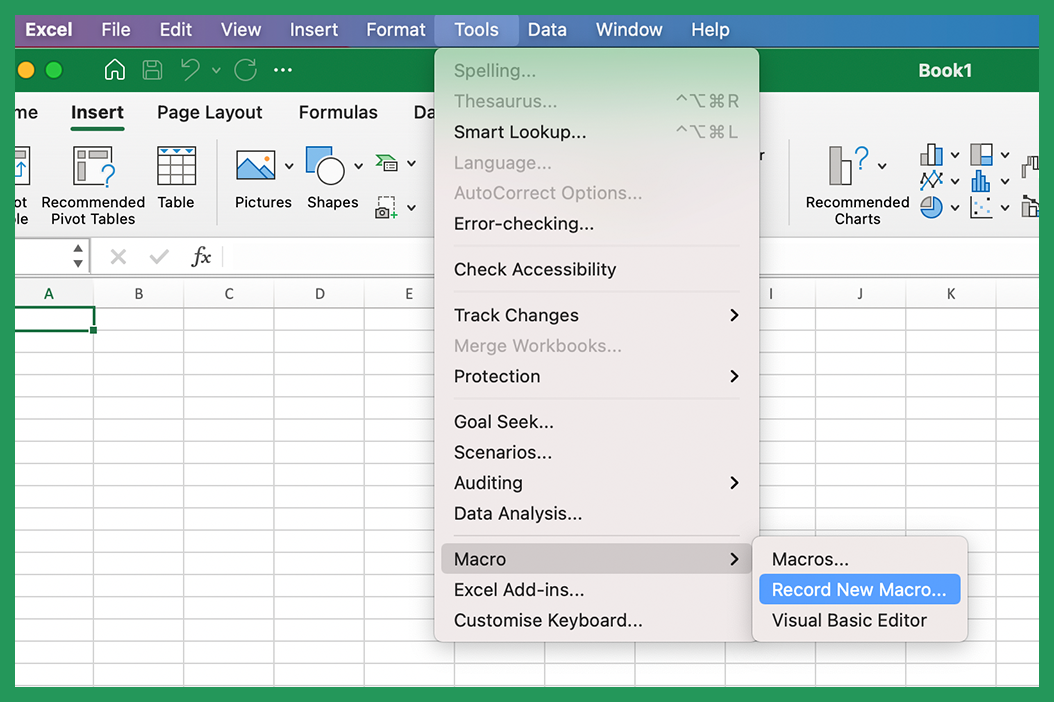
1. Press Alt + F11 (Fn + opt + F11 on Mac) on your keyboard to open the Microsoft Visual Basic for Applications window.
2. Double click on ThisWorkbook in the Project Explorer pane.
3. Copy and paste the following code into the Code window that opens up:
Private Sub Workbook_SheetActivate(ByVal Sh As Object)
Dim ws As Worksheet
Set ws = ActiveSheet
ws.Columns.Hidden = True
End Sub
4. Press F5 on your keyboard to run the macro.
5. Click on the sheet name where you want to hide all columns.
Macro To Unhide All Columns in an Entire Spreadsheet
To unhide all columns in a spreadsheet, follow these steps:
1. Press Alt + F11 on your keyboard to open the Microsoft Visual Basic for Applications window.
2. Double click on ThisWorkbook in the Project Explorer pane.
3. Copy and paste the following code into the Code window that opens up:
Private Sub Workbook_SheetActivate(ByVal Sh As Object)
Dim ws As Worksheet
Set ws = ActiveSheet
ws.Columns.Hidden = False
End Sub
4. Press F5 on your keyboard to run the macro.
How to Unhide the First Column in Excel
Unhiding can be straightforward. That is until you have several hidden columns but want to display only the left-most one. Then, pick one of the methods below to singularly unhide the first column in your table.
Unhiding Column A using the Go To Option
We can select cell A1 to unhide the first column. Here are the steps:
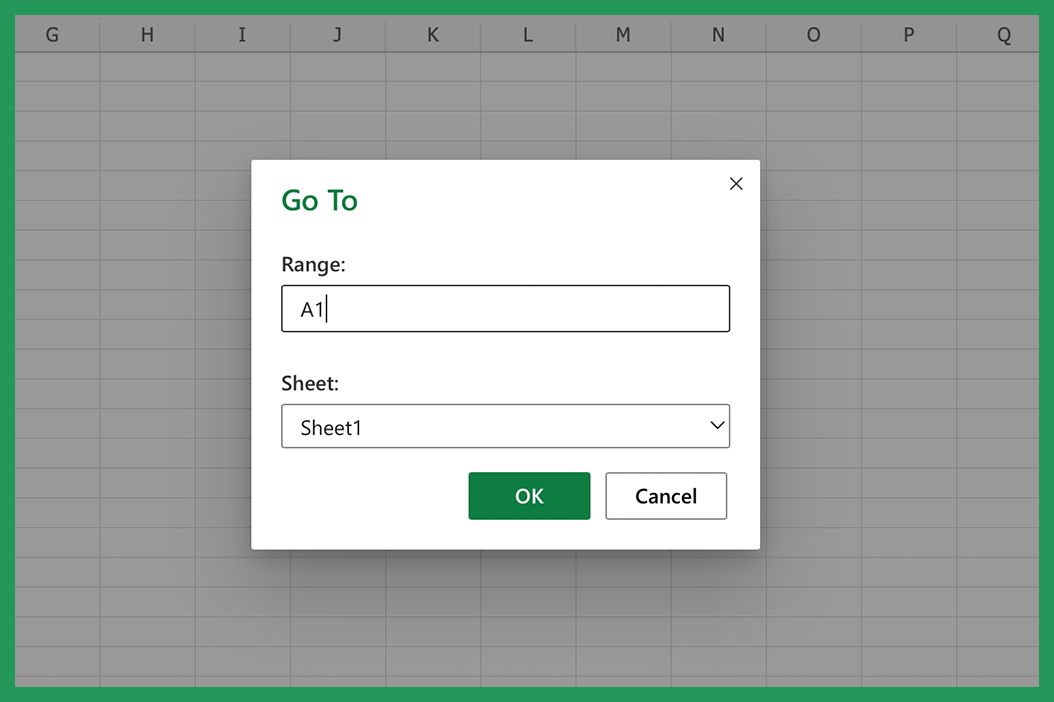
- Press F5 or click the Home tab > Find & Select > Go To…
- The Go To dialog box will then appear. Enter "A1" in the Reference: field and choose OK.
- Cell A1 is now selected, although you can't see it just yet.
- All that's left to do is click the Home tab > Cells group, and click Format cells > Hide & Unhide > Unhide Columns.
Expanding the First Column to Unhide It
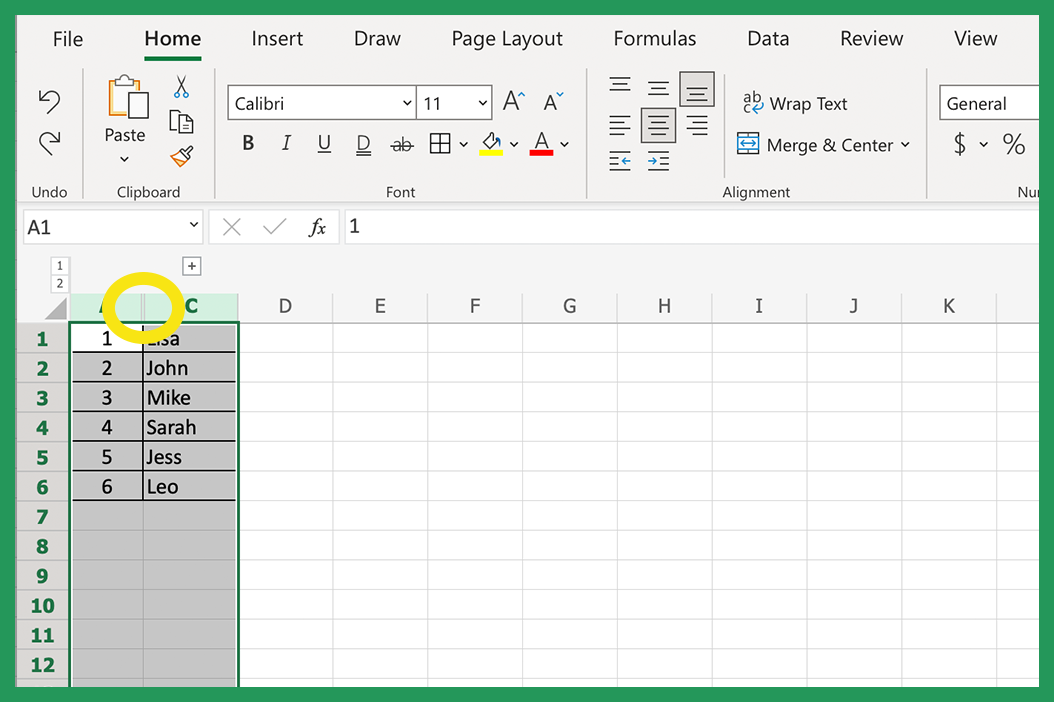
- Click on column B's header to select it.
- Carry your mouse cursor left of the header, where you'll see the double-sided arrow.
- Now all you need to do is drag the arrow to the right to expand the hidden column A.
How You Can Unhide Column A Through Selection
- Select Column B by clicking on the header.
- Drag your cursor over to the left until you see the border color has changed. The color change is the only indicator that column A is selected right now.
- Release the cursor and click the Home tab > Cells group > click Format cells > Hide & Unhide > Unhide Columns.
And there we have it! This process will reveal column A while the others remain hidden.
Show all Hidden Columns in Excel using Go To Special
As an alternative to dragging the cursor or selecting a column or several others, you can use the Go To Special function to reveal all hidden columns at the same time. Here's how:
Click the Home tab > Editing group > click Find & Select from the drop-down menu > Go To Special.
In the Go To Special box, select Visible cells only from the options.
Click OK to close the box and highlight all hidden columns.
Finding The Number of Hidden Columns in a Worksheet
Using the Go To Special Method
To find out how many hidden columns are currently in your spreadsheet, you can use the following steps:
Click the Home tab > Editing group > click Find & Select from the drop-down menu > Go To Special.
In the Go To Special box, select Visible cells only from the options.
Note the number of highlighted columns in the spreadsheet. This is the number of hidden columns currently present.
Using the Document Inspector
While the Go To Special option is great, there is a better way for more extensive workbooks. It's called the Document Inspector.
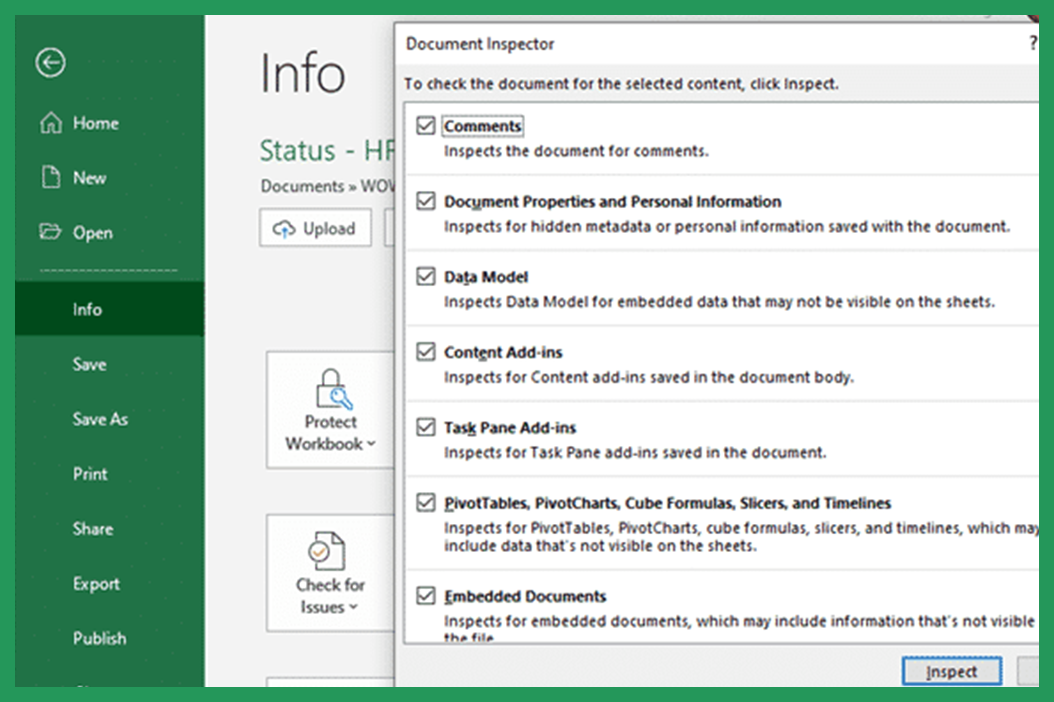
What is the Document Inspector in Excel?
The Document Inspector is a powerful inbuilt tool that can help you clean up many things in your workbooks, including:
- invisible worksheets
- hidden rows and columns
- personal information
- workbook and worksheet properties and metadata
- links to other files
To access the Document Inspector, go to the File tab and click Info. Then, click Check for Issues and select Inspect Document.
You will be asked to save your changes.
- Tick the Hidden Rows and Columns checkbox from the Document Inspector box
- Click Inspect, and the Inspector will get to work!
- The Results of the hidden rows and columns will be revealed, along with the option to Remove All.
The Document Inspector is incredibly helpful for those who have just obtained a worksheet and are unsure what the status is.
Other Tips for Keeping your Excel Spreadsheet Neat and Tidy
Having a crazy and cluttered work environment isn't nice at the best of times. When using Excel, many people can get overloaded with numbers and strings, leaving their spreadsheet looking messy. This usually impacts workflow and can leave many people feeling overwhelmed. Here are some tips to help you keep your spreadsheet tidy:
- Use a consistent naming convention for all your worksheets.
- Use a consistent format for all your workbooks.
- Create and use a consistent layout for all your workbooks.
- Use meaningful names for all your named ranges.
- Utilize the comments feature to document your worksheets and update colleagues.
- Use conditional formatting to highlight important information that you don't want any viewers to miss.
- Use data validation to ensure the accuracy of your entire workbook.
- Use a macro to automate a repetitive task, primarily to hide and unhide a hidden row or multiple rows. There are many other uses for them - so check out our other guides, which you can access on our website.
- You can hide or unhide a row or cell in your worksheet to better organize and present your workbook. When you hide a row, the cells are not printed. To reveal data, you can select the cells that surround the cells and then select Unhide from the right-click menu.
Keeping your documents tidy with tactics such as these means you will be able to focus solely on the tasks at hand. You'll feel clearer in your mind and maybe even less overwhelmed. Not to mention, you'll impress a lot of people with your knowledge - that's for sure!
Our Final Thoughts
So, there you have it. Finally, you have lifetime access to our comprehensive guide to hiding and unhiding cells in Excel. We'd love to see you back here if you need a refresher or if you know someone just discovering the wonders of Excel. The starting processes and basics of Excel are something we all have to learn as we delve into the amazing world of Microsoft! We hope this article has helped teach you how to hide/unhide rows in Excel.
If you have any questions, want to learn more, or have suggestions, please don't hesitate to let us know via the contact us page. As always, thanks for reading!